This example shows how to implement a RESTful web client that connects to RESTful Web Service. This example client handles text/html. It has a JavaFX user interface that prompts the user for the number of tablespoons and passes the user value to the server where the server converts the number of tablespoons to cups. The server passes the conversion information back to the client, which displays it to the user.
The example was built with the following software configuration:
- JDK1.8.0_45
- Apache Tomcat v8.0.36
- Eclipse Mars.2 Release (4.6.0)
Steps
The application client depends on a working service. Complete RESTful Web Service before you run (step 7) and test (step 8) the client application.
- Create an Application Client Project
- Configure as Maven Project
- Add Maven Dependencies
- Create Package and Java Class
- Enable JavaFX
- Clean, Update, and Build Project
- Start Tomcat Server
- Run As Java Application
- Test the Client Application
- Exercises
1. Create Application Client Project
- Start Eclipse.
- Select File > New > Project to display the New Project wizard.
- In the New Project wizard, navigate to Java EE > Application Client Project.
- In the Application Client Project window, in the Project Name field, type UIBakerRESTJerseyClient.
- Click Next twice to display the Web Module window.
- Check the check box next to Generate web.xml deployment descriptor.
- Click Finish.
2. Configure as Maven Project
- Right-click the UIBakerRESTJerseyClient project.
- In the drop-down menu, select Configure > Maven Project.
A pom.xml file displays at the end of your project.
3. Add MAVEN Dependencies
- Right-click the pom.xml file.
- In the drop-down menu, select Open With > Maven POM Editor.
- In the Maven POM editor, select the Dependencies tab at the bottom.
- In the Dependencies tab, click the Add button to add the following dependencies.Tips: Use the Enter groupId, artifactId, etc. field to find them. For example, type asm in the field and expand each result until you find 3.3.1.
- asm : 3.3.1
- jersey-bundle: 1.19
- jersey-server : 1.19
- jersey-core : 1.19
- json : 20140107: To find this one, type org.json in the field and scroll to org.json json. Expand it to find 20140107.
Note: If you get the Index downloads are disabled, search results may be incomplete message when you add dependencies, do this:
- Select Window > Preferences.
- In the left side, select Maven.
- Check the Download repository index updates on startup box.
Your final pom.xml file should look like this:
<project xmlns="http://maven.apache.org/POM/4.0.0"
  xmlns:xsi="http://www.w3.org/2001/XMLSchema-instance"
  xsi:schemaLocation="http://maven.apache.org/POM/4.0.0
  http://maven.apache.org/xsd/maven-4.0.0.xsd">
  <modelVersion>4.0.0</modelVersion>
  <groupId>UIBakerRESTJerseyClient</groupId>
  <artifactId>UIBakerRESTJerseyClient</artifactId>
  <version>0.0.1-SNAPSHOT</version>
  <packaging>app-client</packaging>
  <build>
    <sourceDirectory>appClientModule</sourceDirectory>
    <resources>
      <resource>
        <directory>appClientModule</directory>
        <excludes>
          <exclude>**/*.java</exclude>
        </excludes>
      </resource>
    </resources>
    <plugins>
      <plugin>
        <artifactId>maven-compiler-plugin</artifactId>
        <version>3.3</version>
        <configuration>
          <source>1.8</source>
          <target>1.8</target>
        </configuration>
      </plugin>
      <plugin>
        <artifactId>maven-acr-plugin</artifactId>
        <version>1.1</version>
        <extensions>true</extensions>
        <configuration>
          <archive>
            <manifestEntries>
              <Main-Class>Main</Main-Class>
            </manifestEntries>
          </archive>
        </configuration>
      </plugin>
    </plugins>
  </build>
  <dependencies>
      <dependency>
          <groupId>asm</groupId>
          <artifactId>asm</artifactId>
          <version>3.3.1</version>
      </dependency>
      <dependency>
          <groupId>com.sun.jersey</groupId>
          <artifactId>jersey-bundle</artifactId>
          <version>1.19</version>
      </dependency>
      <dependency>
          <groupId>com.sun.jersey</groupId>
          <artifactId>jersey-server</artifactId>
          <version>1.19</version>
      </dependency>
      <dependency>
          <groupId>com.sun.jersey</groupId>
          <artifactId>jersey-core</artifactId>
          <version>1.19</version>
      </dependency>
      <dependency>
          <groupId>org.json</groupId>
          <artifactId>json</artifactId>
          <version>20140107</version>
      </dependency>
  </dependencies>
</project>
4. Create Package and Java Classes
- In your UIBakerRESTJerseyServer project under appClientModule, add the com.rest.jerseyclient package.
- Under the com.rest.jerseyclient package, add the UIBakerRESTJerseyClient and the UICalculateCups classes.
- Copy the following code into the BakerRESTJerseyClient class file.
This implementation forms the URI with a variable at the end instead of hard-coding the number of tablespoons when calling TbsCupsService.convertTtoC(). You could also just add 16 at the end of the URI, but using a variable means you can change the value at runtime based on user input.
UIBakerRESTJerseyClient class:
package com.rest.client;

import javafx.application.Application;
import javafx.event.ActionEvent;
import javafx.event.EventHandler;
import javafx.scene.Scene;
import javafx.scene.control.Button;
import javafx.scene.control.Label;
import javafx.scene.control.TextField;
import javafx.scene.layout.BorderPane;
import javafx.stage.Stage;

public class UIBakerRESTJerseyClient extends Application {
    TextField textField;
    Label text, clicked;
    Button button, clickButton;
    BorderPane BPane;
    String retrievedText = null;
    private boolean _clickMeMode = true;

    @Override
    public void start (Stage primaryStage) {
    //Create GridPane
    BPane = new BorderPane();
    BPane.setId("grid-pane");
    BPane.getStyleClass().add("pane-styles");

    //Create Scene and add Grid
    Scene Scene = new Scene(BPane, 275, 275);
      Scene.getStylesheets().add(this.getClass().getResource("/restexample.css").toExternalForm());

    //Create the stage and add the scene
    primaryStage.setTitle("FileIO Application");
    primaryStage.setScene(Scene);

    text = new Label("Enter tbs to convert to cups:");
    textField = new TextField();
    textField.setMaxWidth(200);
    button = new Button("Click Me");
    button.setOnAction(new EventHandler<ActionEvent>() {

    @Override
    public void handle(ActionEvent event) {
      if (_clickMeMode) {
        retrievedText = textField.getText();
        //Clear text field
        textField.setText("");
        //Calculate number of cups
        UICalculateCups cupsCalc = new UICalculateCups();
          try {
            String calculatedCups = cupsCalc.getTbstoCupsResponse(retrievedText);
            if (calculatedCups.contains("[a-zA-Z]+") == false && calculatedCups.length() > 1) {
               text.setText("Number of cups in tbs: \n\n" + calculatedCups);
            }
          } catch (Exception e) {
            text.setText("Client: Click Again and enter a number");
          }
          BPane.getChildren().remove(textField);
          button.setText("Click Again");
          _clickMeMode = false;
      } else {
        text.setText("Enter tbs to convert to cups:");
        BPane.getChildren().add(textField);
        textField.setText("");
        button.setText("Click Me");
        _clickMeMode = true;
      }
    }
  });

  //Set positions for each control in the BorderPane
  BPane.setTop(text);
  BPane.setCenter(textField);
  BPane.setBottom(button);

  //Show the scene
  primaryStage.show();
}

  //main method
  public static void main(String[] args){
    launch(args);
  }
}
The UICalculateCups class implementation forms the URI by calling the path method with a string variable at the end.
WebResource webResource =
  client.resource("http://localhost:8080/UIBakerRESTJerseyServer/rest/ttocservice/").path(value);
Alternately, you could hard code the number of tablespoons to convert to cups as follows, but using the path method enables you to change the value on-the-fly based on user input.
WebResource webResource =
  client.resource("http://localhost:8080/UIBakerRESTJerseyServer/rest/ttocservice/16");
UICalculateCups class:
package com.rest.client;

import com.sun.jersey.api.client.Client;
import com.sun.jersey.api.client.ClientResponse;
import com.sun.jersey.api.client.WebResource;

public class UICalculateCups {
  protected String getTbstoCupsResponse(String retrievedText) {
    String output = null;
    String output2 = null;
    try {
      String value=retrievedText;
      Client client = Client.create();
      WebResource webResource = client.resource("http://localhost:8080/UIBakerRESTJerseyServer/rest/ttocservice/").path(value);
      ClientResponse response = webResource.accept("text/html").get(ClientResponse.class);
      if (response.getStatus() != 200) {
        throw new RuntimeException("Failed : HTTP error code : " + response.getStatus());
      }
      output = response.getEntity(String.class);
      output2 = output.replace("@Produces(\"text/html\") Output: ","");
      System.out.println(output2);
      System.out.println("\n\n");

    } catch (Exception e) {
      System.out.println("Server: Click Again and enter a number");
    }
    return output2;
    }
}
Note: If Eclipse indicates that packages are missing, it might mean the project isn’t finding the Maven dependencies. To fix this, go to Step 6 and Clean and Update the project. If the problem is with JavaFX classes, go to Step 5 to enable JavaFX.
5. Enable JavaFX
JavaFX is not by default enabled on Eclipse. The easiest way to enable JavaFX is to add the path to jfxrt.jar to your build path.
- Right click the UIBakerRESTJerseyClient package.
- In the drop-down menu, select Build Path > Configure Build Path.
- In the Libraries tab, select Add External JARs.
- Add the path to your jfxrt.jar file, for example:
C:\Program Files (x86)\Java\jre1.8.0_91\lib\ext.
Alternately and especially if you plan to do a lot of JavaFX programming, you can install e(fx)clipse, which is a plugin for Eclipse that supports JavaFX. See the following link for more information: https://www.eclipse.org/efxclipse/install.html#for-the-lazy.
6. Add Cascading Style Sheet to the Project
You must create and add this style sheet to your project:
- Right-click the com.rest.client package and select File > Other
- Highlight CSS File under Web > CSS File and click Next
- Name the CSS fIle restexample.css and click Finish.
- Locate the CSS file in your project and open it.
It should be under the com.rest.client package. If it is not, then move it. - Change the top line from @CHARSET “ISO-8859-1”; to [@CHARSET “ISO-8859-1”;]
- Copy and paste the following style sheet definitions into the css file:
[@CHARSET "ISO-8859-1";]
    /* Global style definitions. Apply to all UI elements in the application. */
    .root {
        display: block;
        -fx-font-size: 14px "Serif";
        -fx-font-family: Tahoma;
        -fx-font-weight: NORMAL;
    }

/* Border pane style definitions. Apply to all UI elements in the border pane.
    The pane-styles style definition was added to the border pane on Line 26. */
    .pane-styles {
        -fx-background-color: rgb(87, 206, 248);
        -fx-hgap: 2px;
        -fx-vgap: 2px;
        -fx-padding: 5px;
        -fx-grid-lines-visible: false;
    }

/* Labels in the border pane have this additional style definition. */
    .pane-styles .label {
        -fx-padding: 10 10 10 0;
    }

/* Text fields in the border pane have these additional style     definitions. */
    .pane-styles .text-field {
        -fx-background-color: #999999, #336699,
        linear-gradient(to bottom, #fff 0%, #ccc 100%);
        -fx-background-insets: 1px, 2px, 3px;
        -background-radius: 0px 0px 9px 0px, 0px 0px 8px 0px, 0px 0px 8px 0px;
        -padding: 5px;
        -fx-display-caret: true;
    }

/* buttons added to the border pane have these additional style definitions. */
    .pane-styles .button {
        -fx-background-color: #707070,
        linear-gradient(#fcfcfc, #f3f3f3),
        linear-gradient(#f2f2f2 0%, #ebebeb 49%, #dddddd 50%, #cfcfcf 100%);
        -fx-background-insets: 1px, 2px, 3px;
        -fx-padding: 3px 20px 3px 20px;
    }
7. Clean and Update
Clean:
- Select the UIBakerRESTJerseyClient project.
- Select Project > Clean
Update:
- Select the UIBakerRESTJerseyClient project.
- Select Maven > Update Project.
8. Run As Java Application
This client works with UIBakerRESTJerseyServer described in Restful Web Service. Make sure you have UIBakerRESTJerseyServer running before you run the client application.
- Right-click UIBakerRESTJerseyClient.
- Select Run As > Java Application.
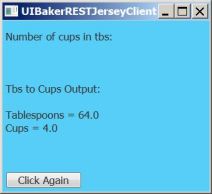
The client application displays.

9. Test The Client Application
Test how the client application performs when the user enters a numeric value, a value of 0, and a non-numeric value for the number of tablespoons.
- In the client application, enter a numeric value for the number of tablespoons you want to convert to cups, and click Click Me.
- Click Click Again.
- Enter 0 and click Click Me.

- Click Click Again.
- Enter a non-numeric value such as dd and click Click Me.

10. Exercises
Expand the UserRESTJerseyClient class to enable the user to specify whether they want to convert from tablespoons to cups or from cups to tablespoons. Expand (and possibly rename) the UICalculateCups class to calculate tablespoons or cups based on the user input.

[…] the RESTful Client with JavaFX UI to work with this server. The main thing you would need to do is to change the URI call in the […]
LikeLike
[…] the RESTful Client with JavaFX UI to work with this server. The main thing you would need to do is to change the URI call in the […]
LikeLike